How to Create Smart Deeplinks using ToDesktop Builder
Learn how to enable smart deeplinking for your ToDesktop Builder application
Introduction
Deeplinks are a type of link that send users directly to an app instead of a website. Implementing deeplinks for desktop apps can be quite complex as it requires setting up bidirectional communication between the website and the user’s local computer.
In this guide, we’ll demonstrate how to implement deeplink functionality with just a few lines of code.
ToDesktop Builder
ToDesktop Builder is an application for creating cross-platform desktop apps. It supports building desktop apps through a no-code interface, with the ability to write custom code for fine grained behaviour. We’ll use todesktop builder to define the core template of the app.
Install ToDesktop Builder
First, you'll need to download the ToDesktop Builder application. Once done, install and run the downloaded application.
Click the Get Started button to begin the authentication process. This will link the web app's credentials with that of the desktop app. Once authenticated, you will be navigated to ToDesktop Builder.
Create new project
If this is your first time using ToDesktop Builder, you will see the create new project screen. If you don’t see this screen, click the application dropdown and select create new project.
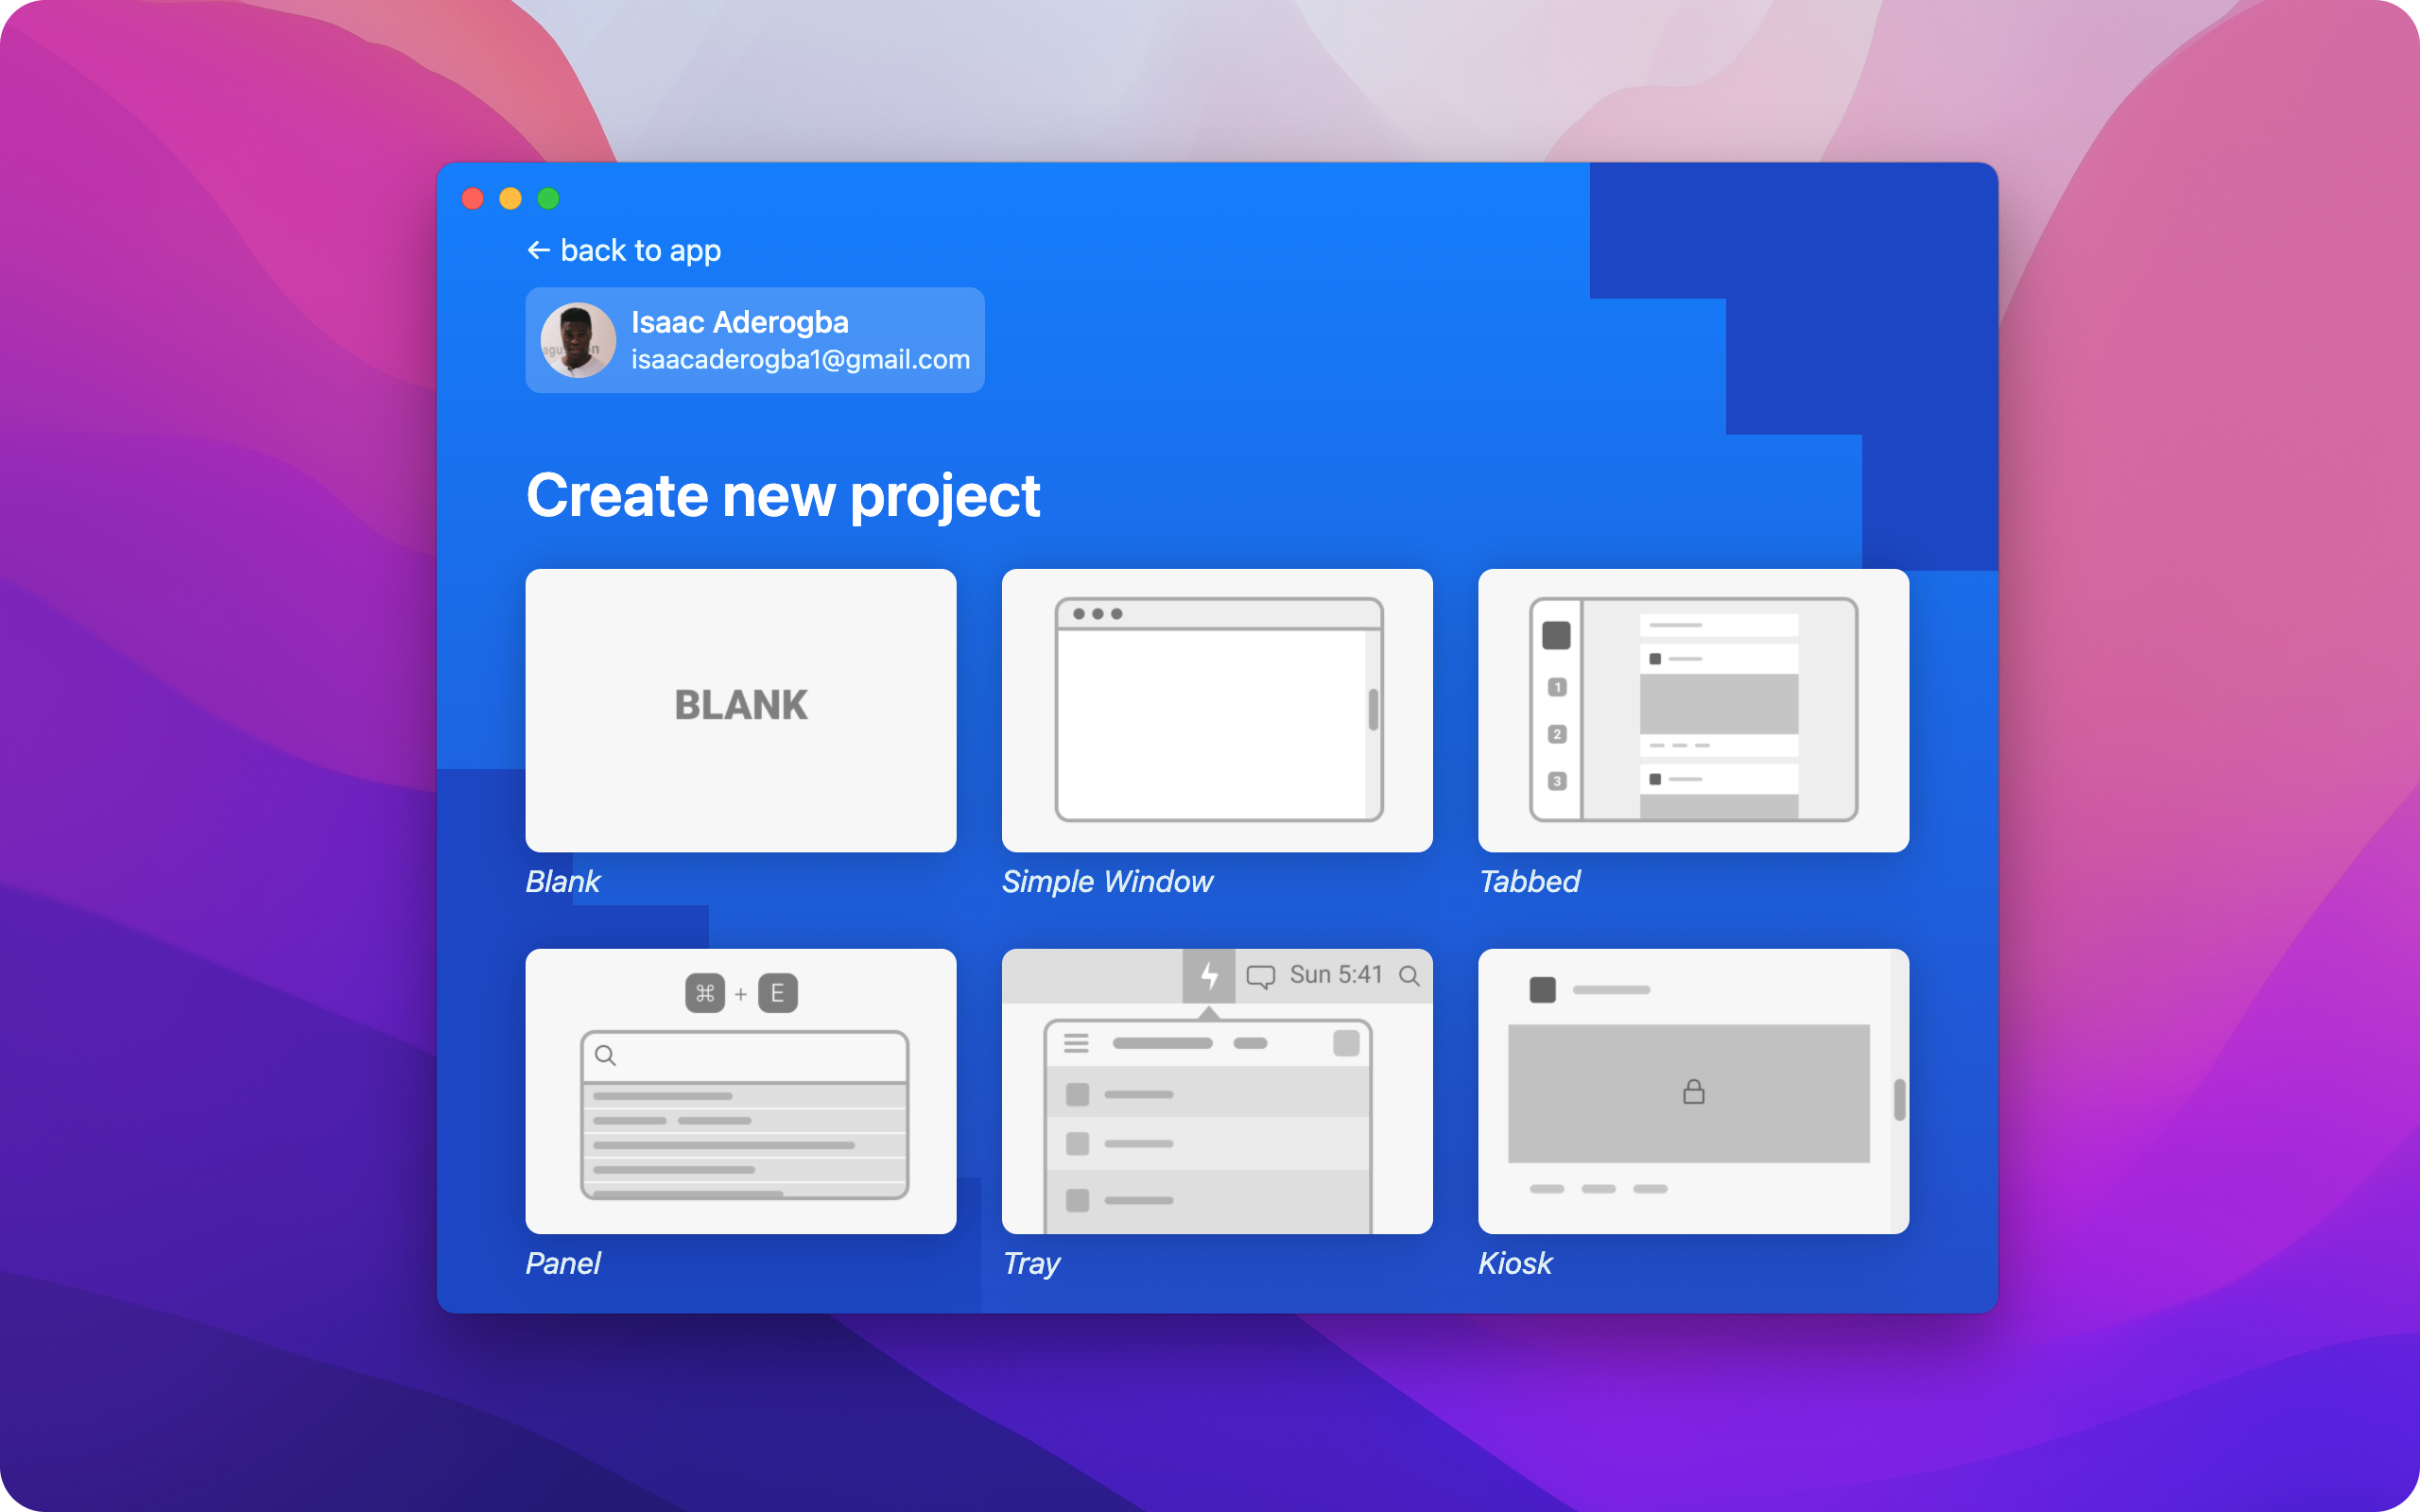
Once here, click the Blank project and enter the following:
Create main window
Next, we’ll create the main window. This window will render our application.
Using ToDesktop Builder, navigate to Windows and create a new window with the following:
You can now click the Run button to start the app. You should now see the ToDesktop icon in your dock, but no visible window.
Install custom plugins
ToDesktop provides a modular plugin system that can add functionality to our desktop app.
We’ll use the @todesktop/comm-server plugin to add functionality for communicating between our desktop app and the web browser.
Using ToDesktop Builder, navigate to Plugins via the sidebar. Then click the Explore button next to the Communication Server plugin. Install the plugin and set the following preferences for the plugin:
Port specifies what server to open on the local computer. @todesktop/comm-server needs an open server in order to communicate from the desktop app to a web browser.
Application
In this section, we’ll start writing code in order to implement deeplinking for a basic web app.
Vite setup
Run the following command to set up an app from scratch with vite.
Select the following according to the different prompts.
Using your preferred code-editor, open the smart-deeplinks project.
First, we’ll delete src/counter.ts and clear the contents of src/main.ts.
Next, we’ll create an about.html file in the root of the directory with the following contents:
Finally, we’ll install the necessary dependencies for interacting with the @todesktop/comm-server plugin that we installed.
Web context
Before we dive into the src/main.ts file, let’s try to orient ourselves.
ToDesktop Builder, at its core, provides a simple interface for converting web apps to desktop apps. Many people who use ToDesktop will run both a web application that’s accessible with a web URL, and a desktop application that is accessible on download.
This means that we have to write code that runs successfully in both the desktop context and the web context:

As the image hopefully illustrates, these contexts are separate. As a result, it’s not possible to communicate directly from the web version of our app to the desktop version of our app.
Fortunately, we’ve installed the @todesktop/comm-server plugin, which creates an intermediary server that both the web and desktop versions of our app can listen to.
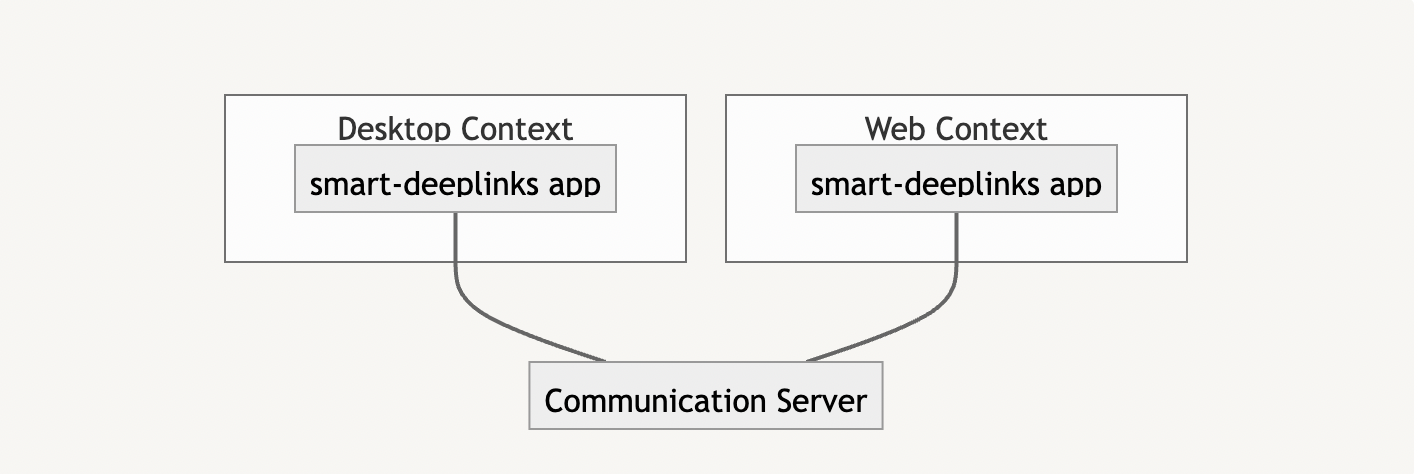
It’s now possible for the web app to open links directly in our desktop app - deeplinks!
Let’s write the code for our web context first in main.ts:
At the top of the file, we import the necessary dependecies.
Then we use the helper platform.todesktop.isDesktopApp() function ton confirm that we’re not running within the context of a desktop app.
Inside of this if block, we want to verify that the communication server is running on one of our specified ports. Recall that we defined these ports when installing the plugin for ToDesktop Builder. If the server is indeed running, we’ll broadcast a message to the desktop context, passing in an object that contains the url we would like the desktop app to open.
Desktop context
Now we can transition to the context of our desktop app. Here, we’ll need to listen for messages from our communication server.
Earlier, we introduced an if condition for when we're running in the web context. This means that an else condition will capture when we’re running in the desktop context. Let’s implement the logic for this else block.
Here, we’ll invoke handleBroadcast, passing in an event listener callback as its only argument. handleBroadcast additionally returns an unsubscribe function if we want to stop listening to the communication server.
The handleBroadcast callback will be triggered whenever our web context sends information to our desktop context. Because we know that our web context will pass an object containing a deeplink url, our desktop context can respond by updating its window location.
To test this out, navigate to your local smart-deeplinks project directory and run npm run dev. Now, start the app via ToDesktop Builder by clicking the "run" button. To trigger the deeplink, open a separate browser window and navigate to http://localhost:5173. You should now notice that the application that is running within the desktop app has re-routed to the /about route (you should see the "about" header on the page). Just like that, we've built a communication bridge between our web and desktop app.