Stream Meeting Transcripts with Recall.ai
This tutorial walks through connecting the Recall desktop plugin to a lightweight web interface so your users can see meeting transcripts in real time. You will install the @todesktop/plugin-recall plugin inside ToDesktop Builder, add the @todesktop/client-recall package to your frontend, and implement the minimal backend endpoint Recall needs to start recording.

📢 Prerequisites
- Latest version of ToDesktop Builder.
- Node.js installed on your development machine.
- Basic familiarity with bundling a small web app (Vite, webpack, or similar).
- An account on Recall.ai and your API key. You may also want to set up an account with assemblyai for transcription.
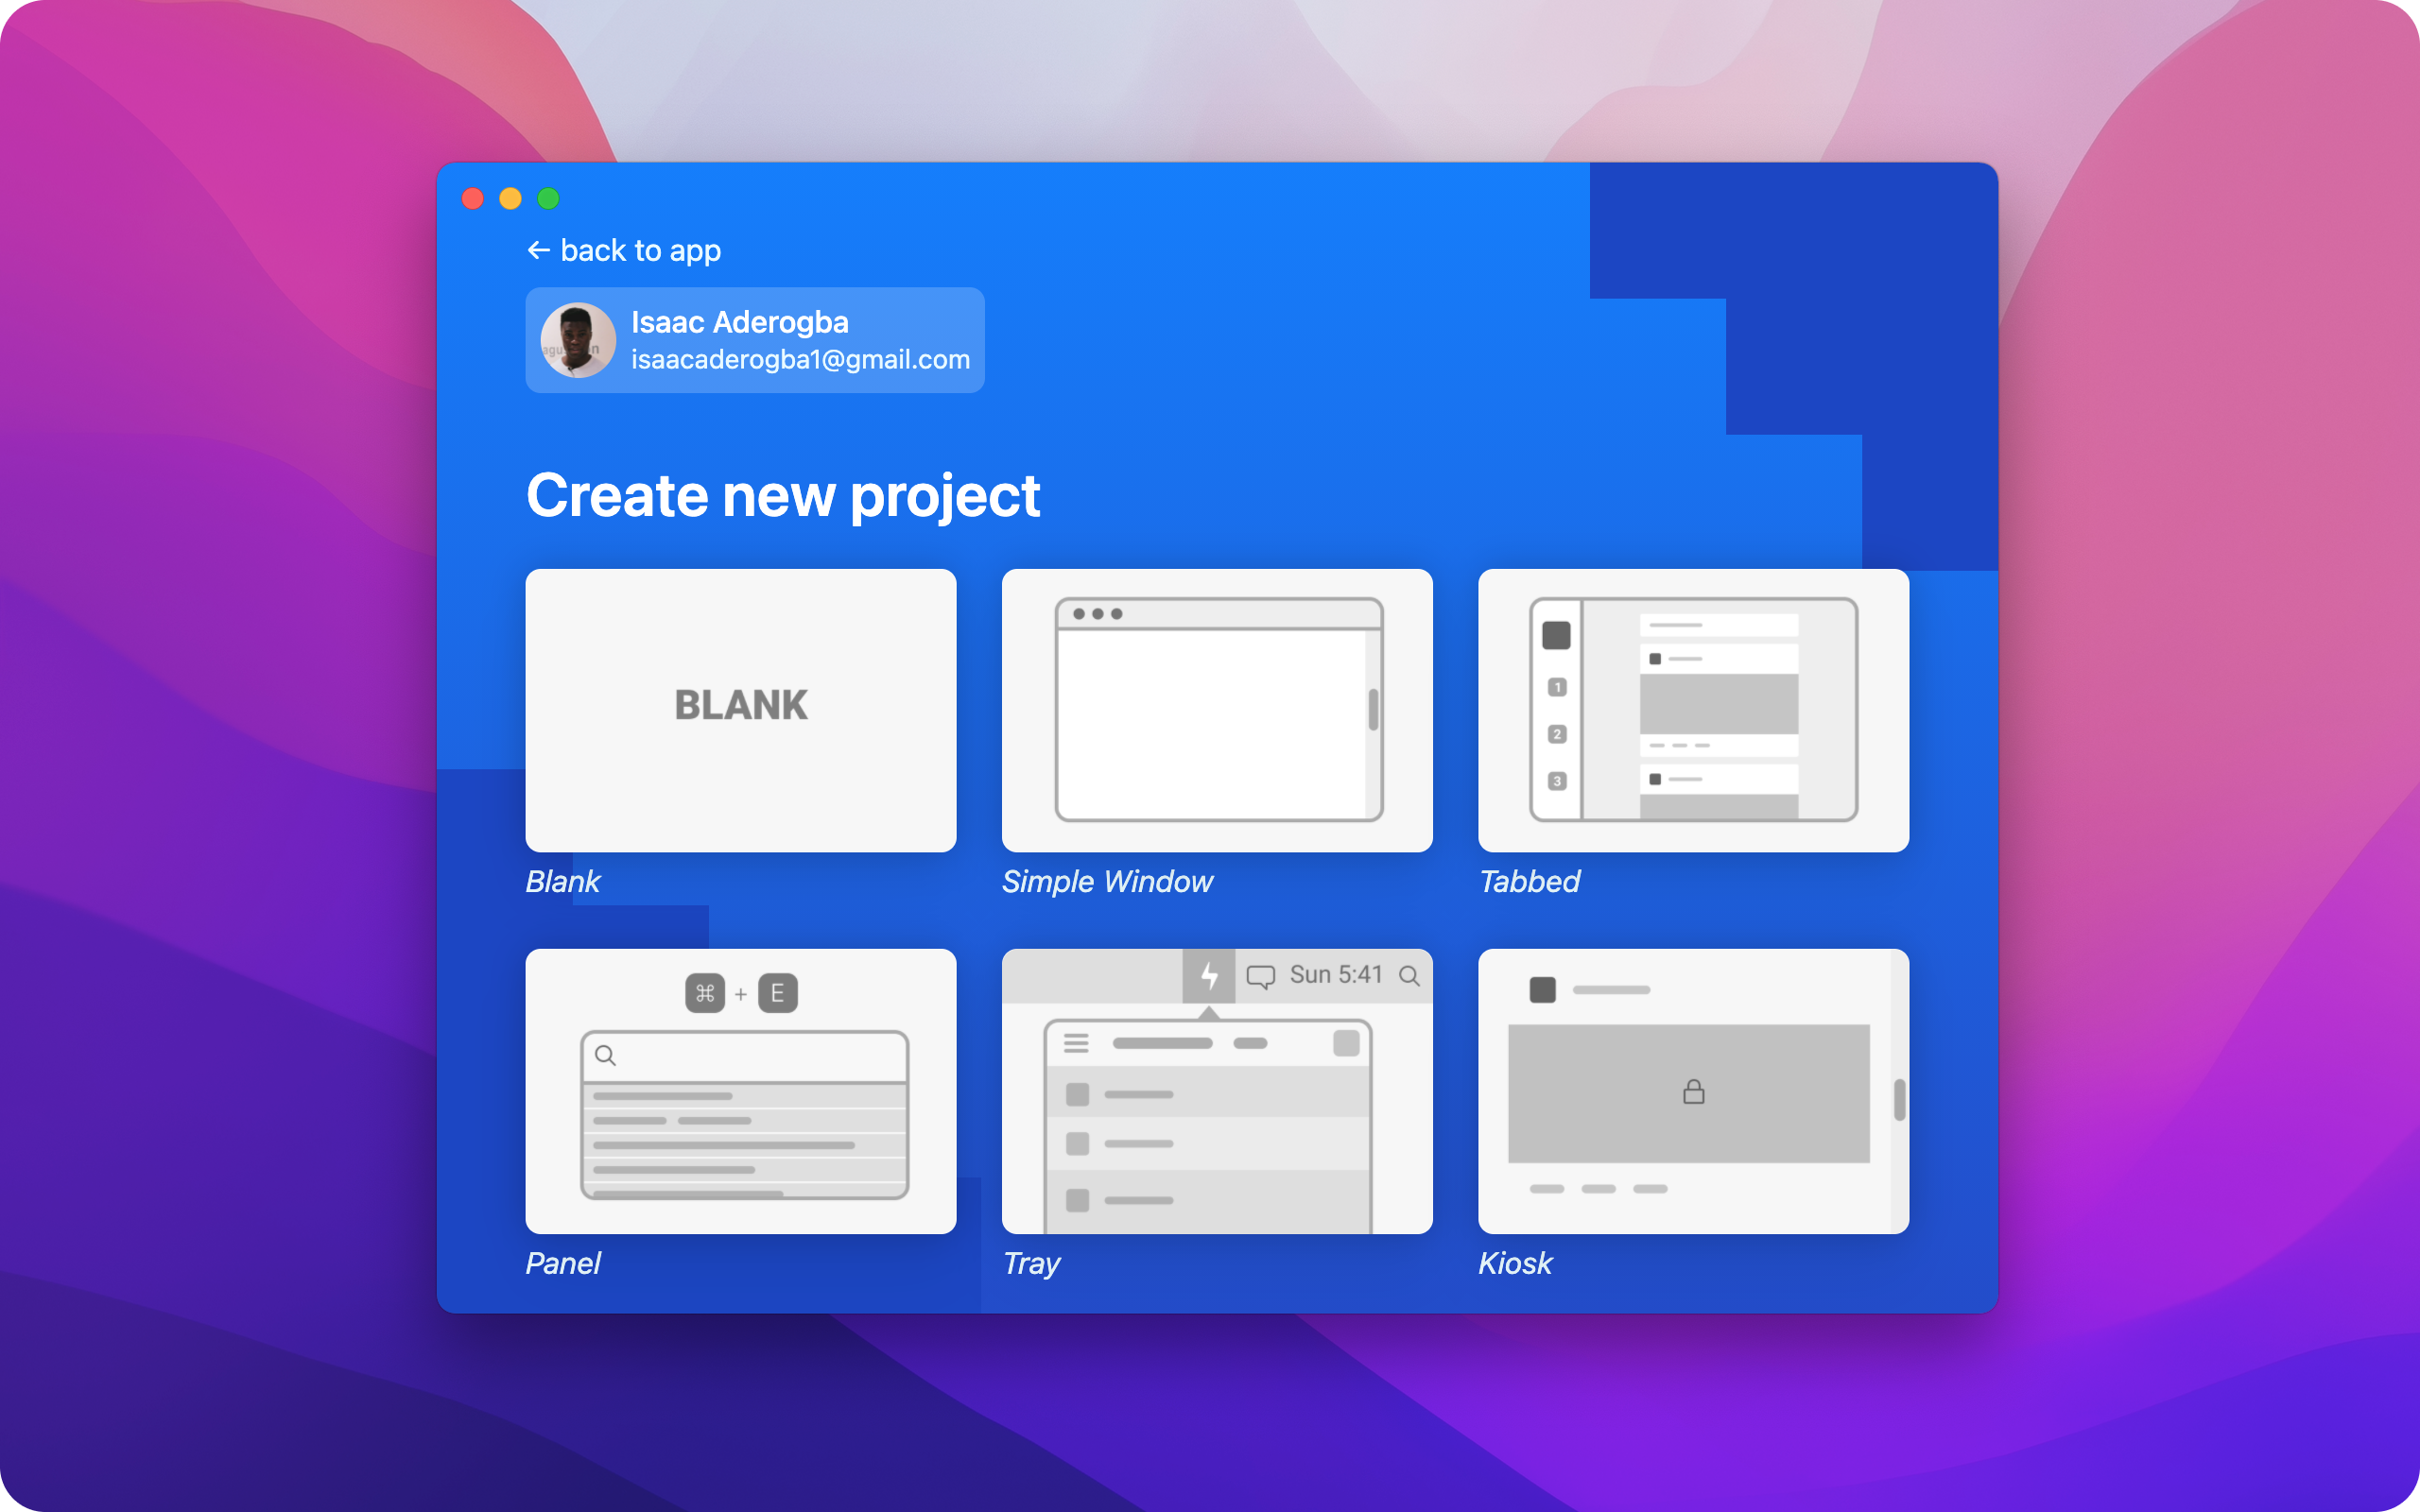
Step 1: Create or open your ToDesktop Builder project
- Launch ToDesktop Builder.
- Create a new project (for example, choose Simple Window) or open an existing one.
- Set the Window URL to where you will host your frontend (during development this might be something like
http://localhost:5173).
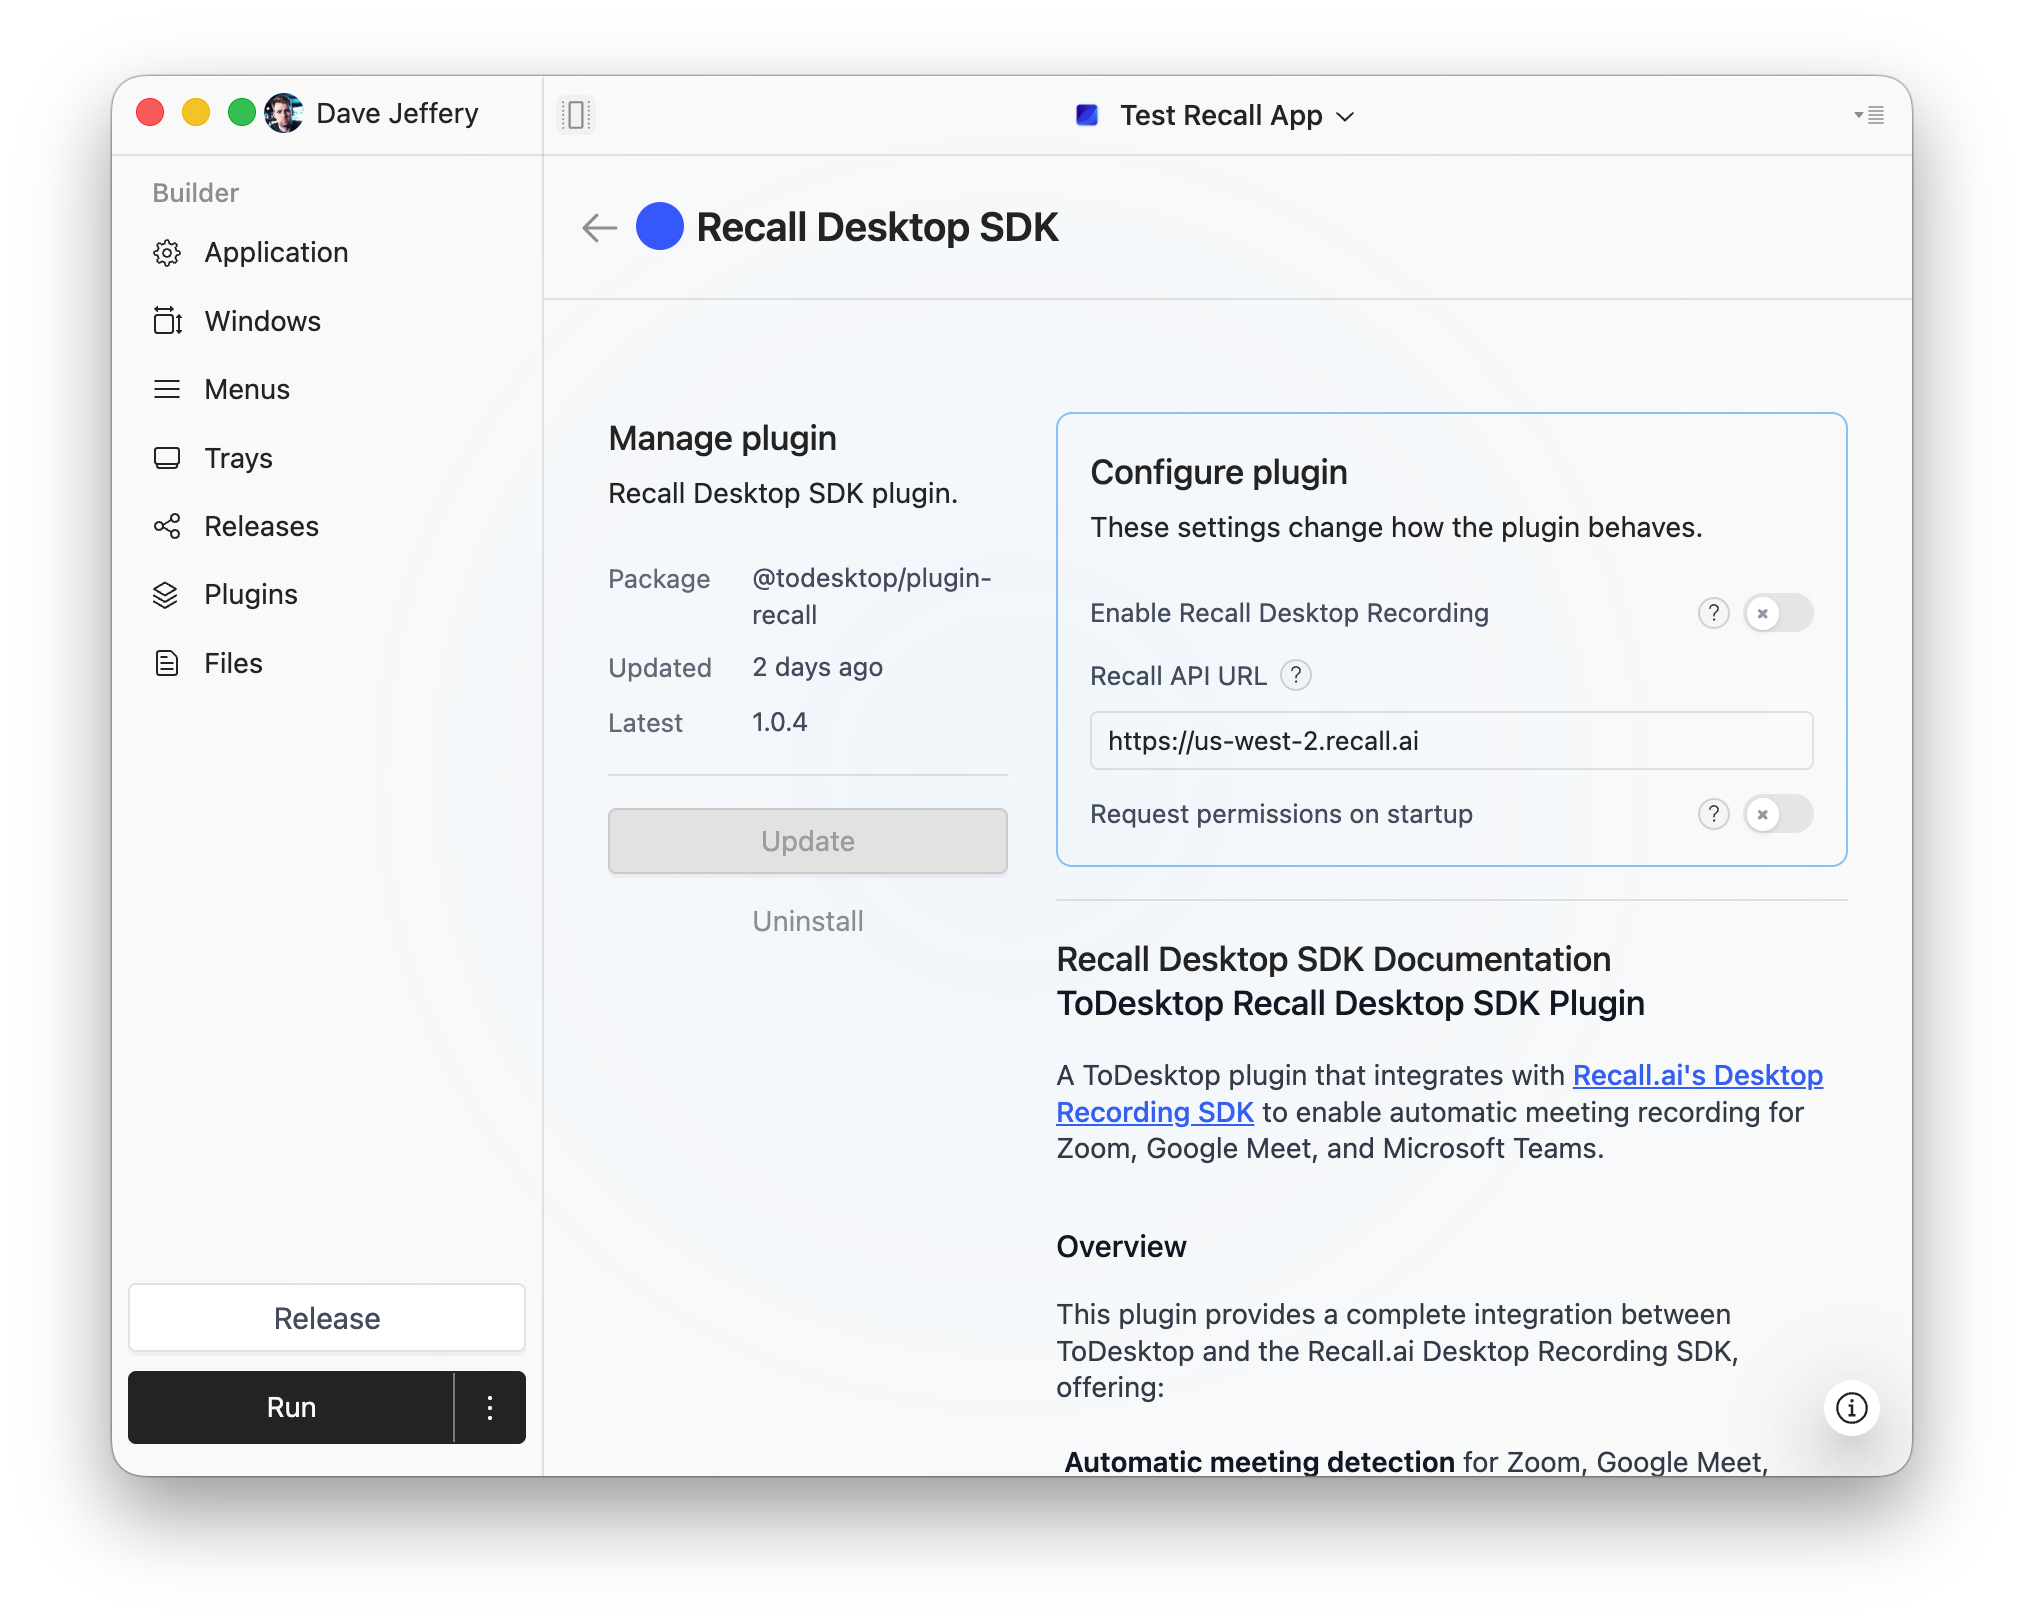
Step 2: Install the Recall plugin
- In ToDesktop Builder, navigate to Plugins.
- Search for Recall and click Install to add
@todesktop/plugin-recallto your project. - Keep the default configuration—no manual setup is required once the plugin is installed.
Installing from the Builder UI bundles the Recall capabilities (meeting detection, audio capture, transcript streaming etc.) inside your packaged desktop app.
🧩 Example source code
If you want to skip ahead, you can find a github repository with the full example source code below:
- Full backend code: todesktop-recall/packages/backend
- Full frontend example: todesktop-recall/packages/example
Step 3: Provide an upload-token endpoint
The Recall plugin calls your frontend, which in turn requests an upload token from your backend. The SDK uses this upload token to fetch the recording configuration from Recall; that response includes a short-lived transcription token used to connect directly to the transcription provider.
Implement a POST endpoint at http://localhost:4000/api/create-sdk-upload (or any URL you configure). The endpoint must accept payloads similar to the one below and respond with JSON that contains an upload_token string.
🧠 How the token works (short version)
Requesting an SDK upload returns an upload token from Recall. Behind the scenes, Recall also obtains a short-lived session token from the transcription provider. When the SDK receives the upload token, it requests the recording configuration from Recall; that response includes the transcription token the SDK uses to communicate with the provider directly.
Check out the Creating an SDK upload on Recall's docs for more details on the payload structure.
Here's a very minimal Express implementation. You will need to add CORS support and error handling to get it production ready. Also, you may want to add a more robust authentication mechanism.
Tip: Log every request with a clear prefix (the example repo uses
[RecallExample]) so you can troubleshoot quickly if the SDK reports an error.
Step 4: Scaffold your frontend project
Any bundler that supports TypeScript works. The snippets below assume Vite:
Update vite.config.ts to emit modern bundles (ES2020) if desired.
Step 5: Build the Recall UI
First create a src/index.html file with the following structure. You probably want to add some styling to make it look nice but we'll keep it unstyle for this tutorial:
Reference frontend: todesktop-recall/packages/example.
Create src/main.ts with the following structure:
Key pieces borrowed from the example repo (todesktop-recall/packages/example):
- Logging helpers keep console output readable (
[RecallExample]→[RecallDemo]). handleMeetingDetectedrequests an upload token and starts recording withrecallDesktop.startRecording.handleRealtimeEventfilters fortranscript.dataevents and renders the transcript text.onRecordingEndedresets the empty state so the UI is ready for the next meeting.
Add matching HTML (e.g., index.html) with elements #status, #emptyState, and #transcript. Styling is optional; the example repo uses a centered card layout but plain markup works.
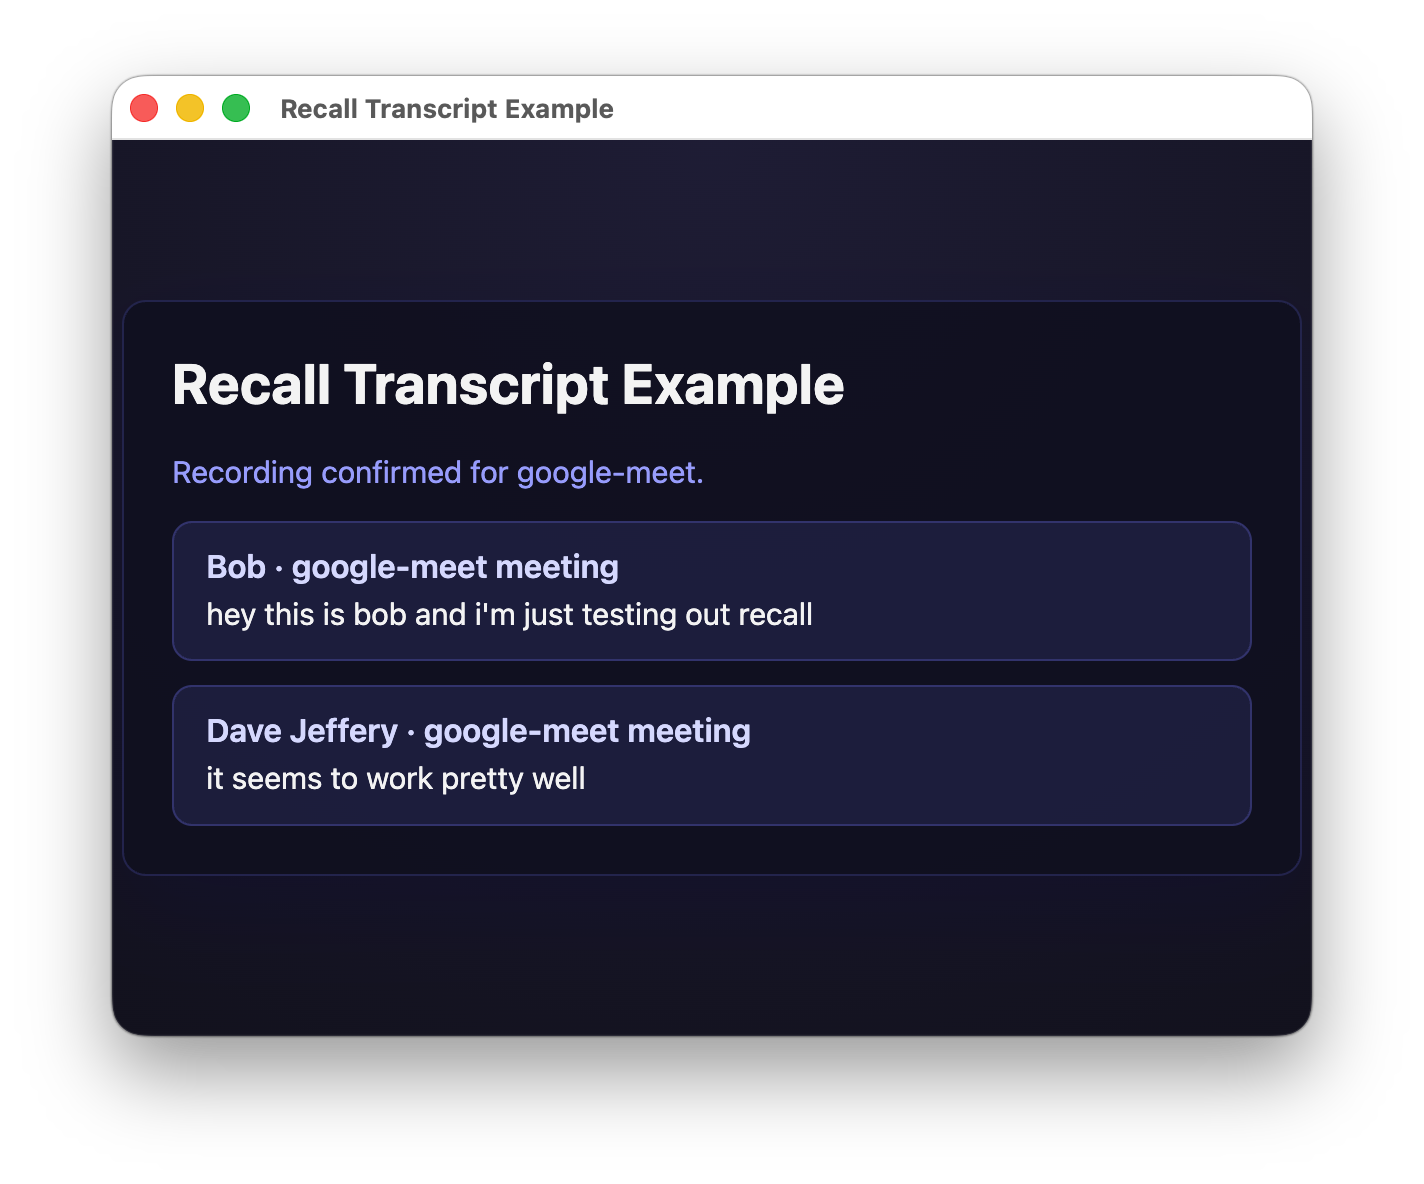
Step 6: Run everything together
- Start your upload-token backend (
node server.js, etc.). - Run the frontend dev server (
npm run devif using Vite). - In ToDesktop Builder, press Play to open the window pointing to your local URL.
- Join a meeting. Watch the status message transition from Initialising… → Waiting for meeting detection… → Recording started… while transcript lines stream into the list.
Troubleshooting
- SDK unavailable: Ensure you open the page inside ToDesktop, not a standalone browser tab.
recallDesktop.isAvailable()returnsfalseoutside the desktop shell. - Token errors: Confirm the backend endpoint returns
200with{ "upload_token": "..." }. Missing or malformed tokens prevent recording. - No transcripts: Check meeting permissions and make sure the plugin is installed. Inspect DevTools for
[RecallDemo]logs. - Duplicate recordings: Track the last active window ID (the example repo uses a
setActiveRecordingWindowIdhelper) to avoid restarting for the same meeting.